THM hosts a free capture the flag game centered around Wireshark and the tool’s features within (https://tryhackme.com/room/wirectf).
Wireshark can be downloaded at https://www.wireshark.org/download.html and can be ran on Windows or Linux. Once you have downloaded Wireshark head to the THM Wireshark CTF Room to grab the first Pcap file, A pcap file is a file of traffic captured from a interface within a space of time. it’s the power of the features within Wireshark as you will see that gives the tool the ability to rebuild and analyse traffic flows captured.
Once you download the first 1.38MB file: net756d631588cb0a400cc16d1848a5f0fb.pcap open the file with Wireshark.
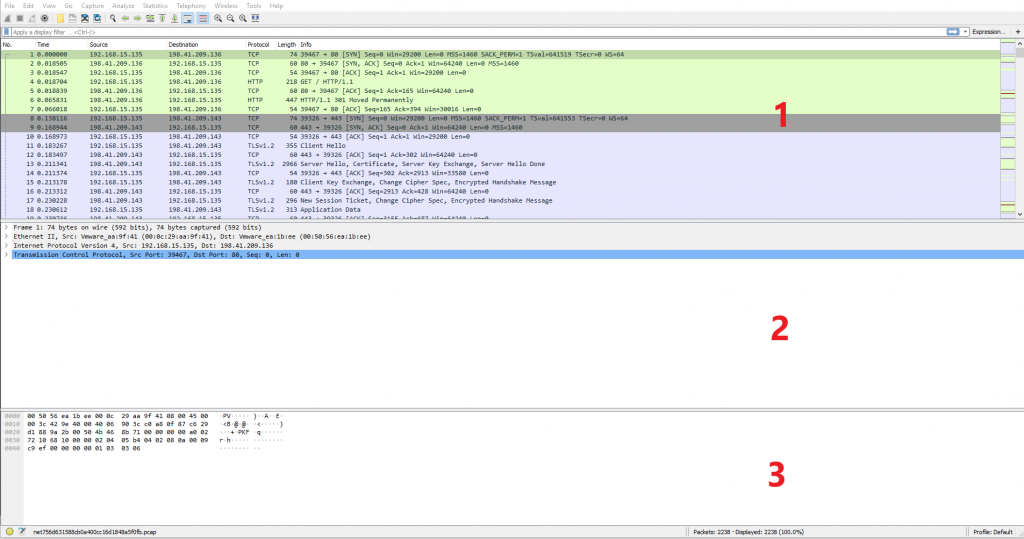
Wireshark has three main sections within the dashboard providing different granularity of analysis.
- Each record within this table represents a packet passing, this includes the source IP, Destination IP, protocol and port numbers used in the connection.
- When clicking on a record within the table in section 1, section 2 contains the data encapsulated within each layer of the packet. This section will provide an insight into the flags being enabled for a connection flow. Additional details such as ciphers and window sizes can also be observed.
- This section contains the raw hex code of the packet.
First Challenge – Flag Within the Packets
Navigating to Statistics-> Conversations and sorting by “packets”
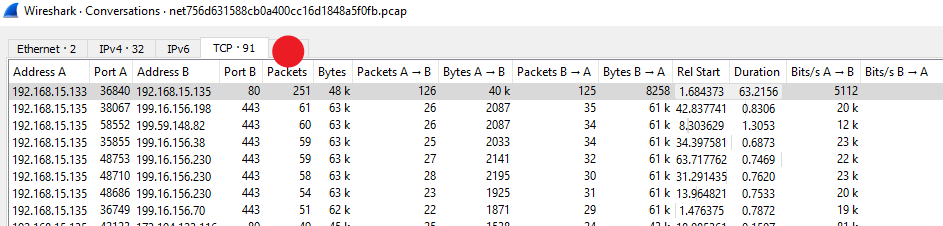
Once the flow is selected view the flow by selecting “Follow Stream” this will reveal the complete data between the two nodes within this conversation.
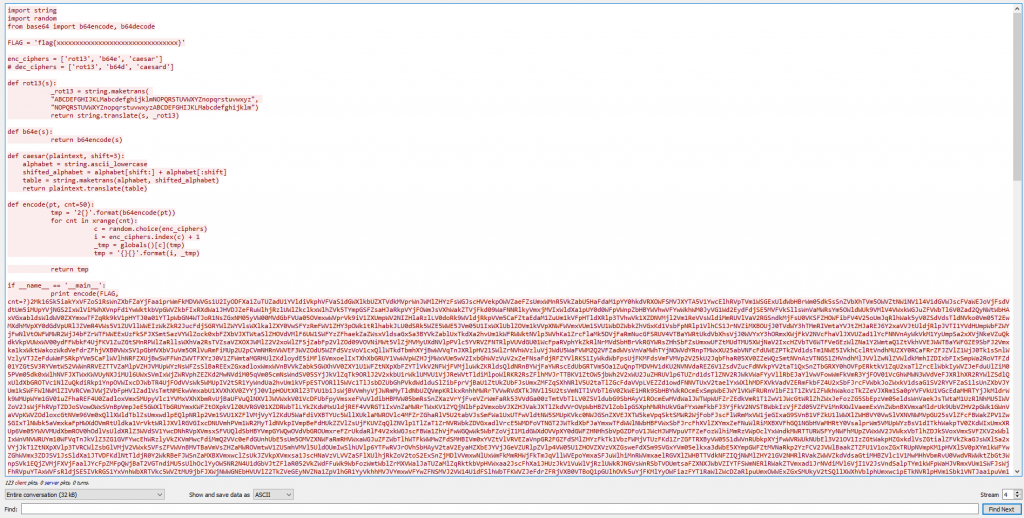
Looking at the conversation it appears to be a python script where the FLAG variable was encoded various times and displayed below. Our task is to take this Python code and reverse the encoding to reveal the original flag.
Firstly, install python2 from the python site: https://www.python.org/downloads/ , make sure to tick add python to PATH Variable. Next install an IDE such as ATOM (https://atom.io/).
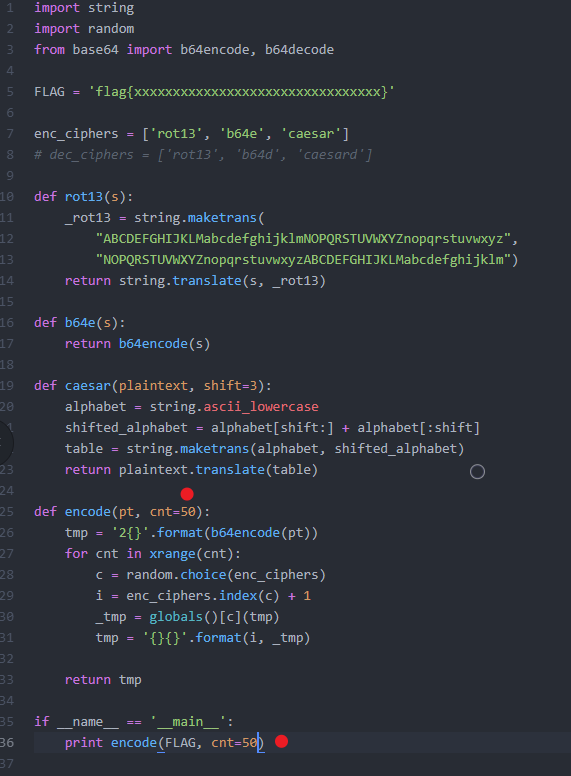
Once completed copy the python code portion of the conversation into a python file with your chosen IDE and run the code to ensure it works. First time running the code will cause a failure due to the “cnt” parameter equals “?”. Looking at the code driving the encode function we can see that the cnt is set to “50”, update the code and re-run.
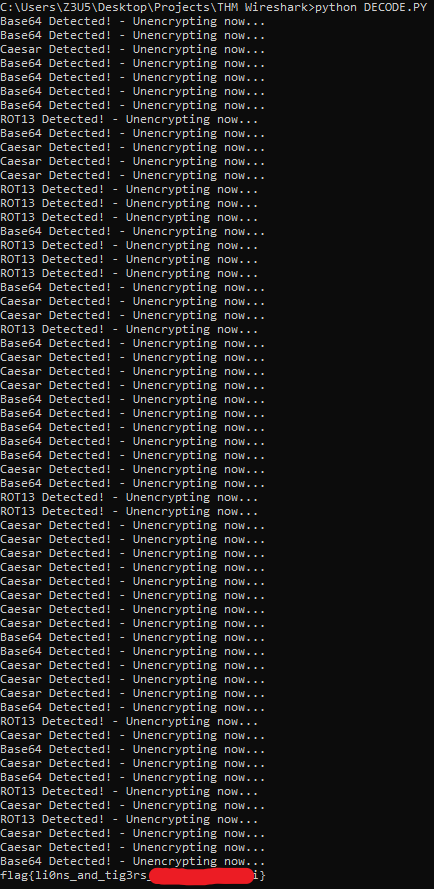
Once the code has run successfully you will receive encoded data on the command line.

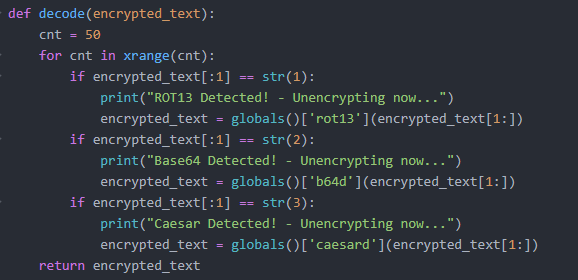
Now we must reverse engineer the code. Notice within the code there is a list for decryption ciphers defined by commented out. Uncomment this code and let’s look and changing each of the encoding functions to decoding functions.
- ROT 13 is a cipher involving moving a character 13 places along for example the letter “A” will be replaced with the letter “N” As there is are 26 letters within the alphabet then this cipher does not need to change.
- Base64 cipher has been provided with the encode and decode function of the package because of this the actual encoding and decoding is handed off to a third-party package we can simply change this to “b64decode”.
- Caesar cipher takes the alphabet and shifts it a given value like the ROT13 method. In this case the encoding script shifts a value of “3”, to reverse this shift the method back “-3”.
Now we have our 3 ciphers decoded ready to decode data. There is another piece to the puzzle, how does the script know what decoder to use? Looking at the “encode” function we can see it adds a value of the selected cipher to the beginning of each encode process.
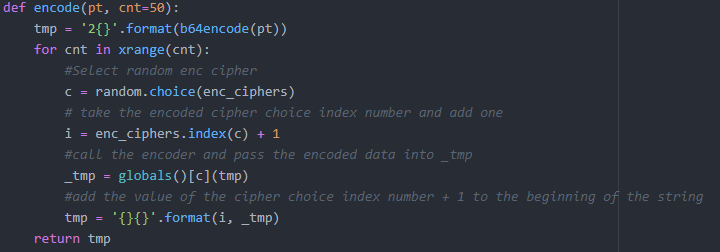
To achieve the right method of decoding each payload we will need to take this value then call the correct decode function.
Once we pass the encrypted flag data in as a variable and call the decode function, we achieve the decode flag.
Challenge 2 – Uncovering Hidden Pumpkins
Download the second pcap file: “happyhalloween2018.pcapng” and load into Wireshark.
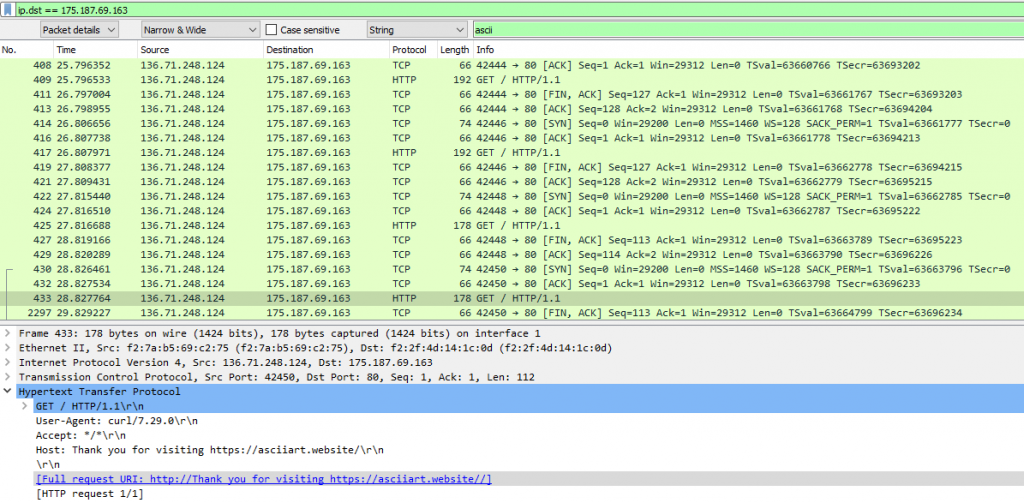
Task one: “When you find the first (most obvious) ascii pumpkin, what was the destination IP address?”
To find this pumpkin we know we are looking for a ascii doing a search for “ascii” within Wireshark shows a flow of data using a website https://asciiart.website we can follow this destination by right clicking and selecting “apply as filter” this shows multiple streams showing what looks like Ascii art.
Task two: “Download all images found in the pcap file. What is the name of the pumpkin image?”
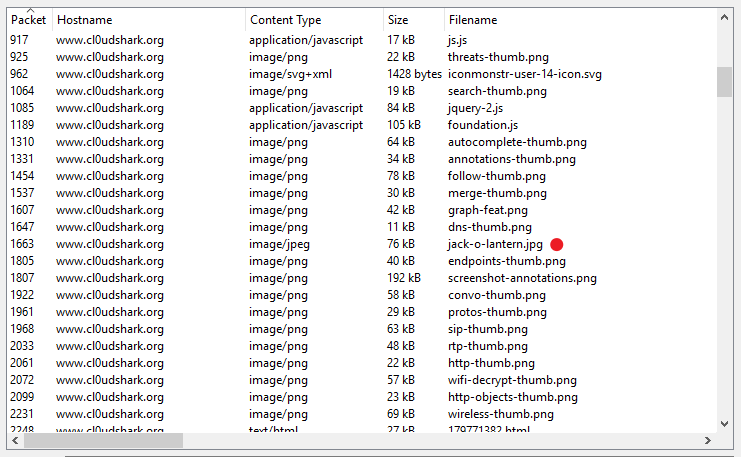
Wireshark can rebuild files that have been fully captured during the capture’s running lifespan. To do this go to File->Export Objects -> HTTP. Looking down the list we see a file named: jack-o-lantern.jpg. select save and open the file
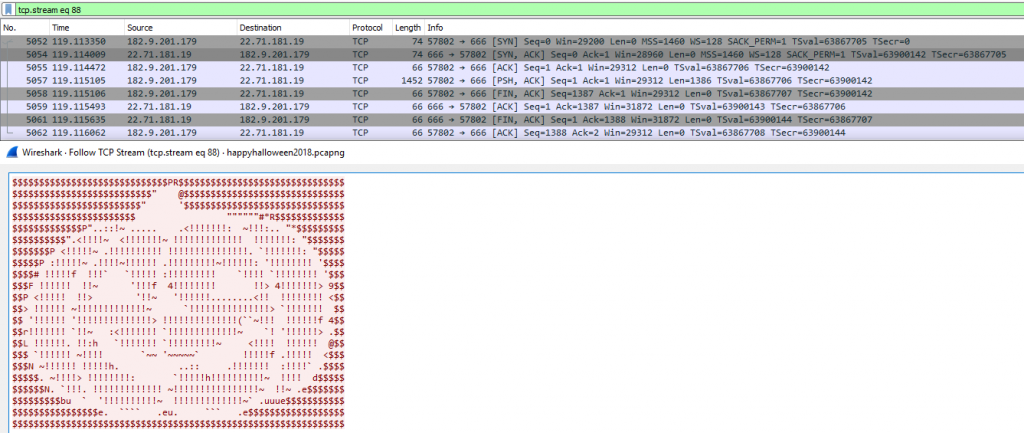
Task three: “Find the pumpkin that on TCP port 666. What’s the main character that makes the pumpkin up?“
For this task a simple Wireshark filter of TCP port 666 can be used, creating a filer of “tcp.port == 666” and then following the TCP stream will reveal the pumpkin.
Task four: “Find the pre-master token and decrypt the traffic. What the file data size of this next pumpkin (in bytes)?”
Looking at the all the different conversations occurring with the Wireshark pcap file under Statistics -> Conversations we can see an email connection was made on port 25. Inspecting this traffic flow presents an email being sent.
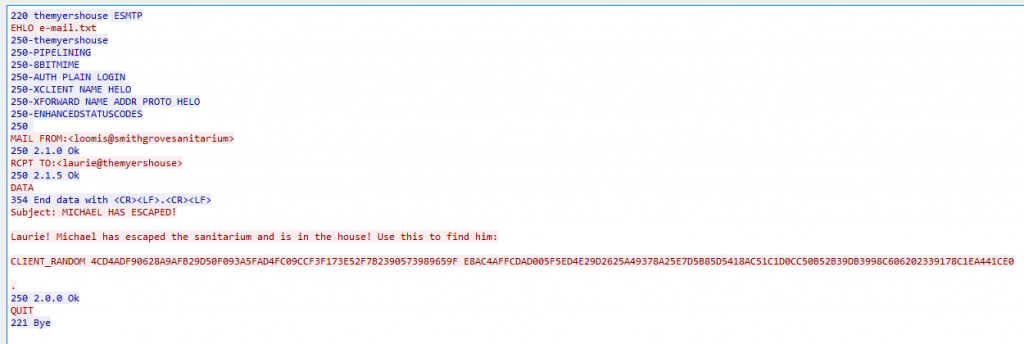
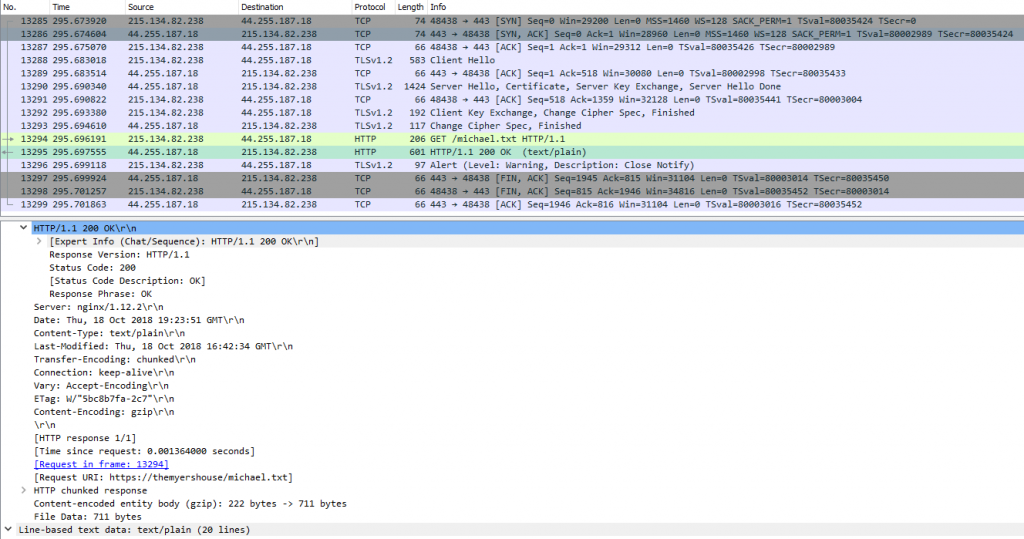
CLIENT_RANDOM refers to the encrypting SSL communications, Wireshark can take this encryption key and decrypt Flows captured into readable text. Copy the “CLIENT_RANDOM” into a text file then navigate to: Edit -> Preferences -> Protocols -> TLS. Add the file into the (Pre)-Master-Secret Log filename section. As the traffic is SSL, we can assume we can search for traffic flows using TCP port 443. We see that a file named “michael.txt” is requested, following the HTTP Stream we see another pumpkin! Looking at the packet section (number 2 of figure 1) expanding the “Hypertext Transfer Protocol” we can see the file-size.
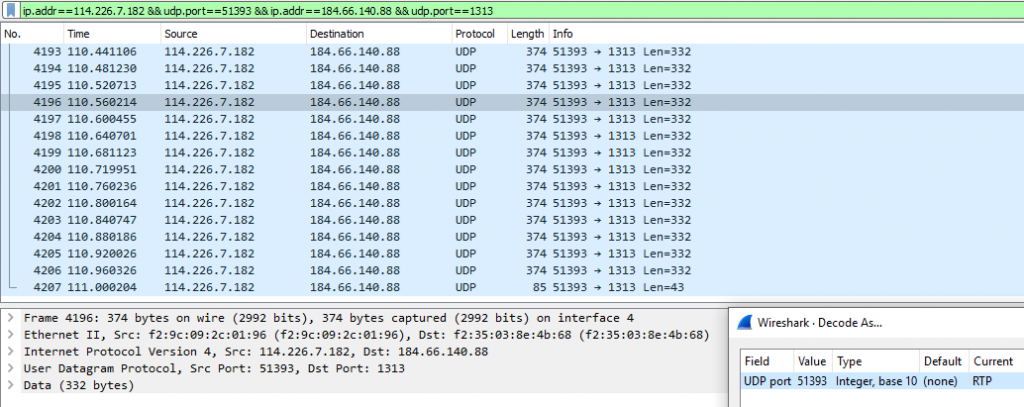
Task five: “Extract the RTP stream. What is the audio file from?”
Wireshark not only can build files that have been captured but Wireshark can also rebuild audio communications such as VOIP or RTP streams. RTP streams can be downloaded via Telephony -> RTP -> RTP streams.
Unfortunately for us we do not find any, this indicates its not a standard RTP stream. As RTP requires the near real time RTP normally will operate on UDP as communications will require less overhead. Checking the conversations list for UDP connections we see a flow on port 1313. Following this stream, we can convert this unknown data to RTP by right click selecting “Decode as” and selecting “RTP”
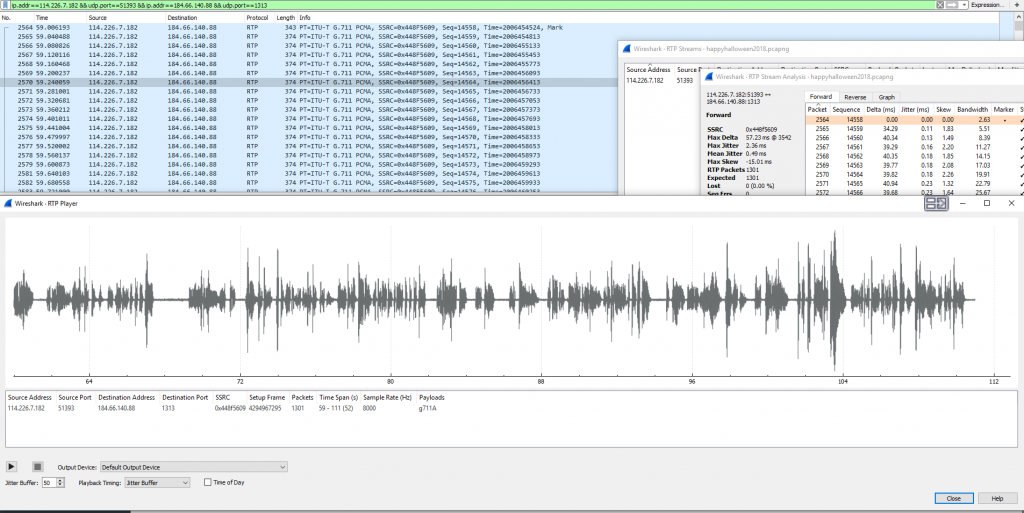
Returning back to the RTP Streams section within Telephony menu, we can see an RTP Stream and select “Analyze”, finally play the audio.
Closing Thoughts
Wireshark has many different features that can be used to uncover much more detail the more you examine a sample. Wireshark is one example of many of the tools on the internet that showcases the importance of using encryption to secure communications, as demonstrated by the practical examples above all flags was discovered due to lack of encryption.
Reach out to me via twitter @PR3R00T for any feedback or questions & Happy Halloween